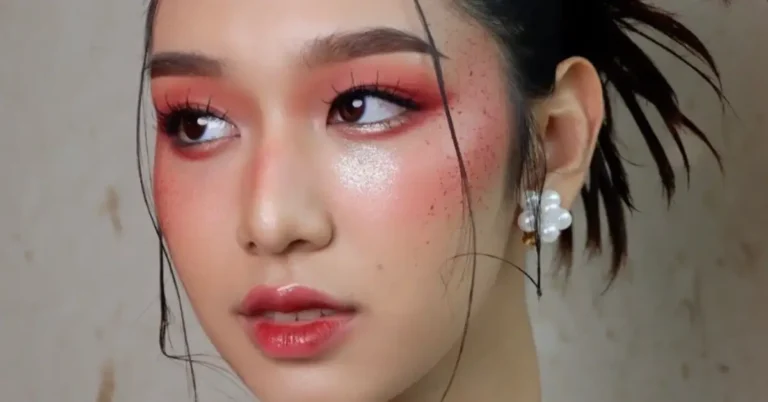

Fed up with the perpetual search for the perfect skincare routine to attain that flawless, dreamy complexion? Search no more – the Gua Sha Face Chart has arrived to guide you towards the glowing, youthful skin you’ve desired. Say goodbye to your lackluster skincare routine and prepare for an upgrade that aims to invigorate, reduce swelling, and reveal your genuine radiance.
In a world overflowing with skincare trends, it’s easy to feel lost, overwhelmed by options that seem to promise the world but deliver little. But here’s the truth: the Gua Sha technique, rooted in ancient Chinese wisdom, has stood the test of time for a reason.
Imagine a morning ritual that’s more than just a routine – it’s a powerful practice that awakens your skin’s natural radiance. The Gua Sha Face Chart isn’t just a piece of paper; it’s a blueprint for a healthier, more youthful version of yourself.
Table of Contents
Gua Sha Face Chart
The gua sha face chart is a helpful tool that can guide you through the process of performing gua sha on your face. This chart shows you the various pressure points on your face that correspond to different organs in your body.
By using the chart, you can target specific areas of your face to improve overall health and well-being. It’s important to note that gua sha should be done gently and with care, as it can be easy to cause damage to the skin if done improperly.
If you’re new to gua sha, it’s best to start slowly and work up to more advanced techniques. You can use a variety of tools, including jade rollers, gua sha stones, and even your own fingers.
The key is to use gentle pressure and to always move in an upward and outward motion. With regular practice, you’ll start to see the benefits of gua sha on your skin, including improved tone, texture, and radiance. So why not give it a try and see what gua sha face chart can do for you?
History and Origin of Gua Sha
Gua Sha is an ancient Chinese healing technique that has been used for thousands of years. The practice involves using a tool to scrape the skin in order to stimulate blood flow and promote healing. While gua sha is most commonly used on the back, it can also be used on the face to improve the appearance of the skin.
The history of gua sha dates back to the Paleolithic Age when hands or stones were rubbed on various parts of the body to alleviate pain and symptoms. It was also widely used as a form of treatment during the Ming Dynasty by the ancient Chinese.
The word “gua” means to scrape, while “sha” refers to the redness that appears on the skin after the treatment. In traditional Chinese medicine, it is believed that gua sha releases unhealthy bodily matter from blood stasis within sore, tired, stiff, or injured muscle areas to stimulate new oxygenated blood flow to the areas, thus promoting healing.
Over the years, gua sha has evolved to include different tools and techniques. Today, it is commonly used in spas and beauty salons as a facial treatment to improve the appearance of the skin. The use of the gua sha face chart has become increasingly popular, which is a visual guide that shows which areas of the face to target for specific concerns.
In recent years, gua sha has gained popularity in the Western world, with many people incorporating it into their skincare routines. While there is limited scientific evidence to support its effectiveness, many people swear by its benefits and find it to be a relaxing and rejuvenating experience.
Understanding the Gua Sha Face Chart

As someone who has been practicing gua sha for years, I know how confusing it can be to understand the gua sha face chart. But fear not, I’m here to break it down for you in a simple and easy-to-understand way.
Firstly, it’s important to note that the gua sha face chart is a map of the face that indicates the different areas where you can apply the gua sha tool. Each area corresponds to a different part of the body and has its own benefits.
Here’s a breakdown of the different areas on the gua sha face chart:
- Forehead: This area corresponds to the bladder meridian and is great for relieving headaches and tension in the neck and shoulders.
- Eyes: This area corresponds to the gallbladder meridian and can help reduce puffiness and dark circles.
- Cheeks: These areas correspond to the stomach and spleen meridians and can help with digestion and lymphatic drainage.
- Jawline: This area corresponds to the small intestine meridian and can help with TMJ pain and tension.
- Neck: This area corresponds to the kidney meridian and can help with overall relaxation and stress relief.
Pro Tip: When using the gua sha tool on the face, always use light pressure and make sure to move in an upward and outward motion. This will help with lymphatic drainage and reduce puffiness
By understanding the gua sha face chart, you can target specific areas of the face and body for optimal results. So, next time you’re practicing gua sha refer to the chart and see how it can benefit you.
Benefits of Using a Gua Sha Face Chart

Are you looking for a natural way to improve your skin health and facial muscle relaxation? Look no further than the gua sha face chart. This ancient Chinese technique involves using a small, handheld tool to massage your face and neck in specific patterns to promote lymphatic drainage, reduce puffiness, and improve circulation.
Skin Health
Using a gua sha face chart can help improve the overall health and appearance of your skin. By increasing circulation and promoting lymphatic drainage, it can reduce puffiness, dark circles, and fine lines. It can also help to brighten the complexion and improve skin tone.
Personally, I have noticed a significant improvement in the texture and firmness of my skin since incorporating gua sha into my skincare routine. It has helped to reduce the appearance of acne scars and hyperpigmentation, leaving my skin looking smoother and more even-toned.
Facial Muscle Relaxation
In addition to improving skin health, using a gua sha face chart can also help to relax facial muscles and reduce tension. By massaging the muscles in the face and neck, it can help to relieve stress and promote relaxation.
I often use gua sha in the evenings before bed to help me unwind and relax after a long day. It has become a soothing and meditative ritual that helps me to release tension and drift off to sleep more easily.
Lymphatic Drainage
One of the main benefits of using a gua sha face chart is its ability to promote lymphatic drainage. By stimulating the lymphatic system, it can help to remove toxins and excess fluid from the face and neck, reducing puffiness and promoting a more sculpted appearance.
Pro tip: To maximize the lymphatic drainage benefits of gua sha, be sure to drink plenty of water and stay hydrated throughout the day. This will help to flush out toxins and keep your skin looking healthy and radiant
Overall, using a gua sha face chart is a simple and effective way to improve your skin health, promote relaxation, and reduce puffiness. Give it a try and see the results for yourself!
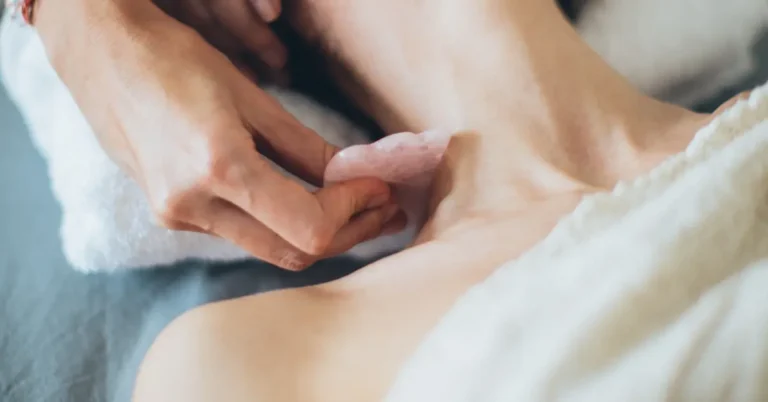
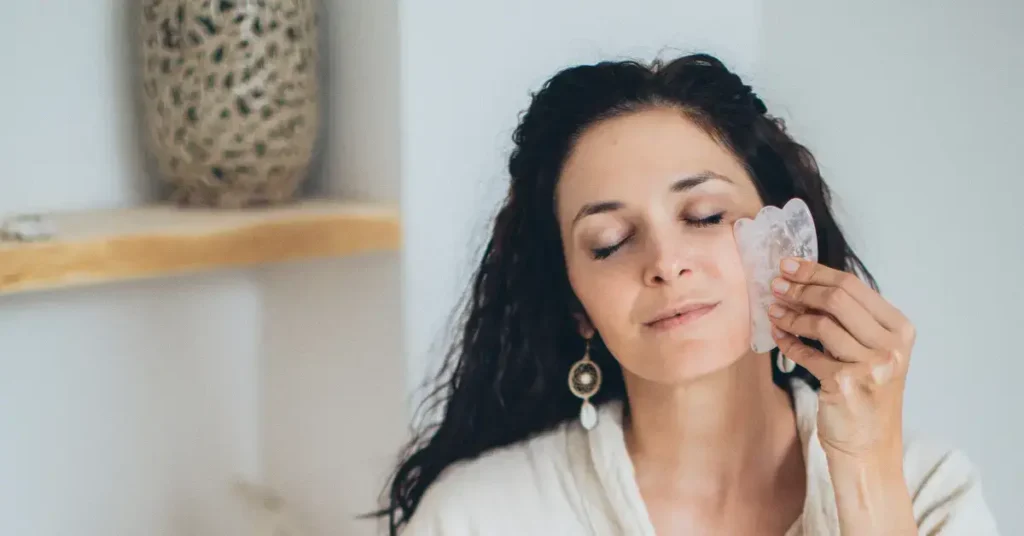
How to Use a Gua Sha Face Chart
If you’re new to gua sha, you might be wondering how to use a gua sha face chart. Don’t worry, it’s easier than you might think! In this section, I’ll walk you through the preparation, techniques, and post-treatment care involved in using a gua sha face chart.
Preparation
Before you begin, make sure you have a gua sha tool and a copy of the gua sha face chart. You can find gua sha tools online or at your local beauty store. Once you have your tools, follow these steps:
- Wash your face with a gentle cleanser and pat dry.
- Apply a facial oil or serum to help the gua sha tool glide smoothly over your skin.
- Take a look at the gua sha face chart and familiarize yourself with the different areas of the face and the corresponding techniques.
Techniques
Now that you’re prepared, it’s time to start gua sha-ing! Here are some techniques to try:
- Start at the neck and work your way up, using long, sweeping strokes.
- Use the flat side of the gua sha tool to gently scrape along the jawline and cheekbones.
- Use the curved side of the gua sha tool to gently scrape along the eyebrows and forehead.
Remember to use light pressure and never scrape too hard or too fast. You want to be gentle and avoid causing any irritation or damage to your skin.
Post-Treatment Care
After you’ve finished using the gua sha tool, follow these post-treatment care steps:
- Wash your face with a gentle cleanser to remove any excess oil or serum.
- Apply a moisturizer to help hydrate your skin.
- Clean your gua sha tool with soap and water and store it in a dry, clean place.
Pro tip: To enhance the benefits of gua sha, try using it in conjunction with a facial roller or other facial massage techniques
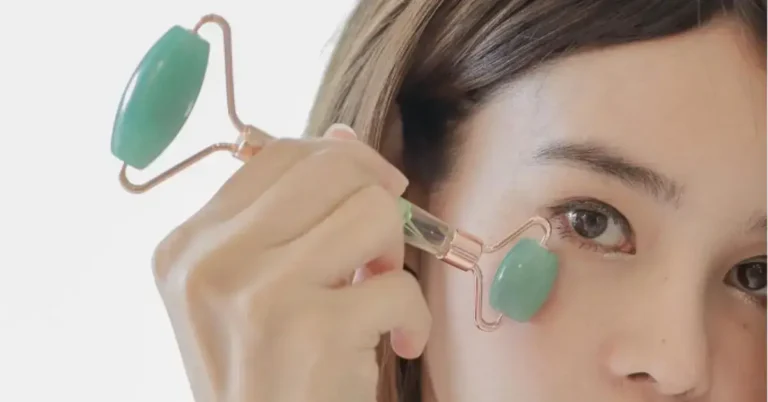
Choosing the Right Gua Sha Tool
If you’re new to gua sha, choosing the right tool can be overwhelming. With so many shapes, materials, and sizes available, it’s hard to know where to start. As someone who has been using gua sha for years, I can tell you that finding the right tool is crucial to getting the most out of your practice.
When I first started using gua sha, I tried a few different tools before finding the perfect one for me. My advice is to start with a simple, easy-to-use tool like a heart-shaped gua sha. These tools are great for beginners because they’re easy to hold and maneuver and versatile enough to be used on different parts of the face.
Once you’ve gotten the hang of using a basic tool, you can start to explore different shapes and materials. Here are a few things to consider when choosing a gua sha tool:
- Shape: Different shapes are designed to target different areas of the face. For example, a tool with a curved edge is great for the jawline, while a tool with a pointed edge is perfect for the under-eye area.
- Material: Gua sha tools can be made from various materials, including jade, rose quartz, and bian stone. Each material has its own unique properties and benefits, so it’s worth doing some research to find the right one for you.
- Size: The size of your gua sha tool will depend on your personal preferences and the areas of your face you want to target. Smaller tools are great for more precise work, while larger tools are better for covering larger areas.

Ultimately, the right gua sha tool for you will depend on your individual needs and preferences. Don’t be afraid to try a few different tools until you find the one that feels right for you. With a little bit of practice and patience, you’ll be able to create your own personalized gua sha face chart and enjoy all the benefits of this ancient practice.
Common Mistakes and How to Avoid Them

When I first started using a gua sha face chart, I made some mistakes that hindered my progress. Here are some common mistakes and how to avoid them:
- Skipping the neck: The neck is like the superhighway to the face. Gua sha won’t work unless the neck is treated too. I’ve found that using a gua sha tool on my neck helps reduce tension and promotes lymphatic drainage, which can help reduce puffiness and improve skin texture.
- Moving too quickly: Slow and steady wins the gua sha game. Moving too quickly can cause skin irritation and may not provide the desired results. I always take my time when using a gua sha tool, starting with slow, gentle strokes and gradually increasing the pressure.
- Using it on dry skin: Gua sha or any other face tool should be used on hydrated skin. Using the tool on dry skin is one of the biggest mistakes ever. Your skin should be slippery and moisturized for the tool to work its wonders without causing any irritation.
- Applying too much pressure: Gua sha should feel like a gentle massage, not a painful experience. Applying too much pressure can cause bruising and irritation. I always start with light pressure and gradually increase it as my skin gets used to the tool.
- Using the wrong tool: There are many different types of gua sha tools available, and each one is designed for a specific purpose. Using the wrong tool can cause skin irritation and may not provide the desired results. I always choose a tool that is appropriate for my skin type and the area I’m targeting.
By avoiding these common mistakes, you can get the most out of your gua sha face chart and achieve the best possible results.
Gua Sha Face Chart: A Recap
Sticking to my guasha routine, I love that for me 🤌🏻
— ɱıƈɧɛƖƖɛ (@evolvingmatter) July 28, 2023
As someone who has been using gua sha for a while now, I can attest to the benefits it has for the face. One of the most useful tools in my gua sha practice is the gua sha face chart. This chart is a visual guide that helps you identify the different areas of your face and the corresponding meridians that run through them.
The gua sha face chart is divided into different sections, each representing a specific part of the face. Some of the most common sections include the forehead, eyes, cheeks, jaw, and neck.
Each section is further divided into smaller areas that correspond to specific meridians. For example, the forehead area is associated with the bladder meridian, while the cheek area is associated with the stomach meridian.
Using the gua sha face chart can be incredibly helpful in targeting specific areas of the face and promoting circulation and lymphatic drainage. By following the chart, you can ensure that you are using the gua sha tool in the right direction and applying the right amount of pressure to each area.
In my personal experience, using the gua sha face chart has helped me to achieve a more sculpted and toned appearance on my face. By targeting specific areas and using the right techniques, I have noticed a significant improvement in the overall texture and appearance of my skin.
FAQ

What is a Gua Sha Face Chart?
A Gua Sha Face Chart is a visual guide illustrating specific facial areas for Gua Sha application. It helps target different skin concerns and enhance overall complexion.
How can I benefit from using a Gua Sha Face Chart?
The chart guides precise Gua Sha techniques to address puffiness, fine lines, and promote skin vitality. Following the chart can help you achieve desired results effectively.
Is the Gua Sha Face Chart suitable for all skin types?
Yes, the Gua Sha Face Chart can be adapted for various skin types. Customize the techniques based on your skin’s unique needs and concerns.
How often should I use the Gua Sha Face Chart?
Incorporate Gua Sha into your skincare routine a few times a week for noticeable improvements. Consistency is key for achieving desired outcomes.
Can I combine Gua Sha with other skincare products?
Absolutely. Gua Sha can complement your existing skincare routine. Apply serums or oils before using the Gua Sha Face Chart to enhance its effectiveness and benefits.
If you liked this blog article about the topic: “Gua Sha Face Chart Explained: How To Use It In 2023”, don’t forget to leave us a comment down below to tell us about your experience.