
Are you fascinated by the concept of microneedling but hesitant about the healing process that follows? You’re not alone! Microneedling has created quite a buzz in the skincare industry, offering the promise of rejuvenated skin and a glowing complexion. However, it’s important to grasp the recovery stages to truly benefit from its effects.
Don’t worry; I’m here to guide you through this fascinating process. I’ll provide you with in-depth insights into microneedling’s healing stages, ensuring you embark on this transformative journey well-prepared.
Together, we’ll explore what to expect, how to navigate each stage, and ultimately, how to achieve the radiant, youthful skin you desire. Say goodbye to uncertainty and hello to the transformative power of microneedling. Let’s embark on this journey towards your skincare goals!
Table of Contents
Microneedling Healing Stages
This minimally invasive procedure has gained a lot of attention for its ability to address various skin concerns, such as signs of aging, hyperpigmentation, scars, and enlarged pores. By creating controlled micro-injuries to the skin, microneedling stimulates collagen production and increases skin cell turnover.
As a result, many people experience brighter, more youthful-looking skin. Learning about the microneedling healing stages ahead of time is crucial to maximize the benefits and achieve your desired results.
In the paragraphs that follow, I’ll dive into the details of the microneedling healing stages, from what to expect immediately after the treatment to the full recovery process. It’s essential to know that, while there may be some downtime, the healing stages are generally manageable and lead to excellent outcomes. With this knowledge, you’ll be better prepared to embark on your microneedling journey with confidence and enthusiasm.
Why You Can Trust Me
Hey there, wondering why you should take my word on the microneedling healing stages? Well, let me share my story and why I’m your go-to source.
First and foremost, I’ve personally walked the microneedling journey. Yup, that’s right! I’ve had a few sessions myself. I’ve experienced the initial excitement, the post-treatment redness, and the gradual transformation. I know the anticipation and curiosity that come with each healing stage because I’ve been there too.
But I’m not just relying on my own experiences. I’ve made it my mission to stay connected with skincare experts and professionals who are well-versed in the world of microneedling. I’ve picked their brains, soaked up their knowledge, and asked the burning questions you want answers to.
So, when I share insights about microneedling healing stages, it’s not just from my personal encounters; it’s also based on the wisdom and guidance I’ve gathered from experts in the field.
Trust me, I’m your skincare buddy who’s got your back, and I’m here to guide you through the fascinating journey of microneedling healing stages with accurate, trustworthy, and friendly advice. Stick around, and let’s explore the path to radiant skin together!
Basics of Microneedling
When I first heard about microneedling, I was intrigued by its potential to improve my skin. Microneedling healing stages became an essential aspect to understand to optimize my experience with this treatment.
Microneedling is a minimally invasive cosmetic procedure that involves creating controlled micro-injuries to the skin. The body’s natural wound-healing response is triggered, leading to increased collagen production and skin cell turnover. These processes can effectively address various skin concerns, such as signs of aging, hyperpigmentation, scars, and enlarged pores.
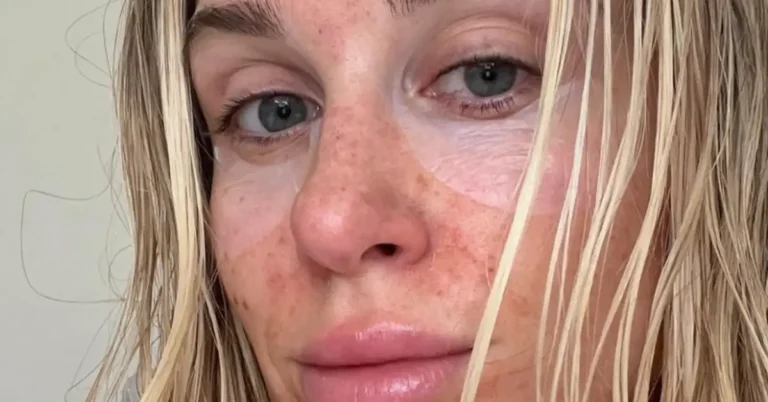
For me, the healing stages of microneedling were crucial to follow. The first stage, which occurs immediately after the treatment, involves mild redness and swelling, similar to a sunburn. It’s essential to keep the skin clean and moisturized during this time. Within a day or two, the redness typically subsides.
The second stage involves the skin starting to tighten and peel. It’s essential not to pick at the skin, as it can lead to scarring. Around this time, the body’s collagen production is working in full force to repair the skin.
By the third stage, a week or so after the treatment, I noticed significant improvements in my skin’s texture and appearance. It continued to look better over time, as the results can take up to four weeks to reach their peak2. It’s essential to maintain a good skincare routine and protect your skin from the sun during this time.
In my experience, understanding the microneedling healing stages was crucial to ensure the best results. It allowed me to be patient and take care of my skin properly, leading to a successful and rewarding treatment experience.
Preparation for Microneedling
As someone who has gone through the microneedling healing stages, I’d like to share my experience and knowledge to make your preparation process a smoother one. The key to achieving optimum results lies in understanding the procedure and planning correctly. Let’s break down the preparation into two sub-sections: Skin Assessment and Choosing the Right Procedure.
Skin Assessment
Before embarking on a microneedling journey, it’s crucial to evaluate your skin properly. I consulted with a skincare professional who helped assess my skin type, sensitivity, and any underlying conditions. Here’s a quick checklist to assess your skin:
- Check for dryness, oily, or combination skin
- Observe any redness or sensitivity
- Identify any existing acne, scars, or pigmentation issues
Pro Tip: It’s beneficial to maintain a daily skincare routine leading up to the procedure to give your skin a little extra TLC.
Choosing the Right Procedure
Once your skin assessment is complete, the next step is to select the right microneedling procedure. It’s essential to choose a professional who specializes in microneedling healing stages, as there are different types of treatments available. These include:
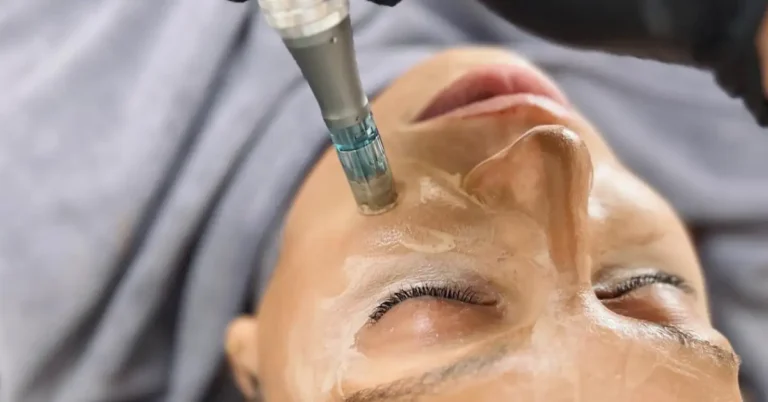
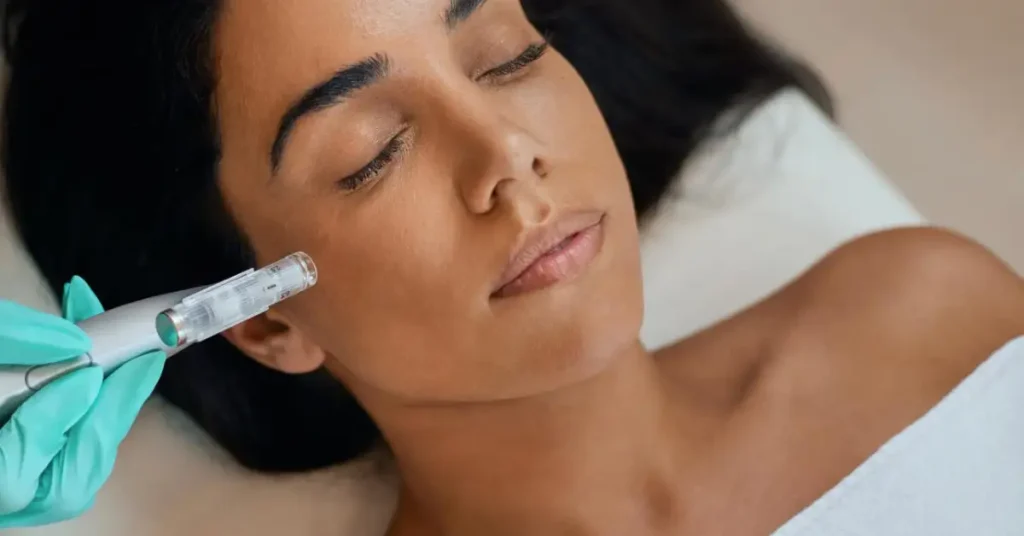
- Derma Pen: A device with tiny needles that move up and down, creating micro-channels in the skin.
- Derma Roller: A rolling cylinder with small needles that create punctures in the skin.
After researching the best treatment plan, I decided on a Derma Pen procedure due to its precision and less invasive technique. This experience taught me the importance of understanding various microneedling options and selecting the one most suited to my skin needs.
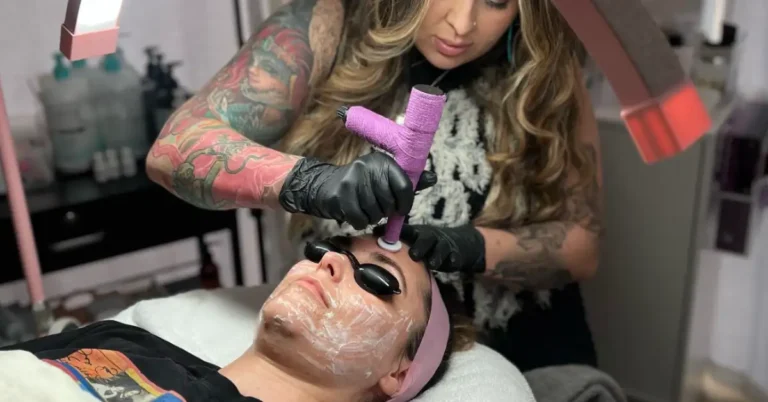
Microneedling Procedure

I recently underwent a microneedling treatment, and the experience was fascinating. I’d like to share with you the microneedling healing stages and what to expect during the procedure.
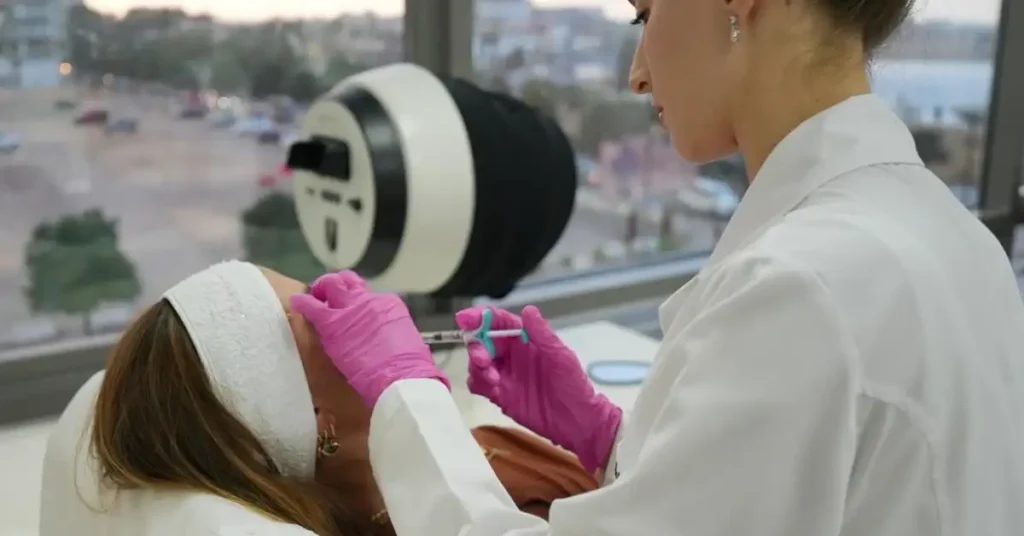
Skin Anesthesia
Before the procedure, my esthetician applied a numbing cream on my skin. This made the overall experience more comfortable, and I barely felt any pain during the treatment. It took about 20-30 minutes for the anesthesia to take effect, providing enough time for my skin to be thoroughly cleansed and prepared for the microneedling process.
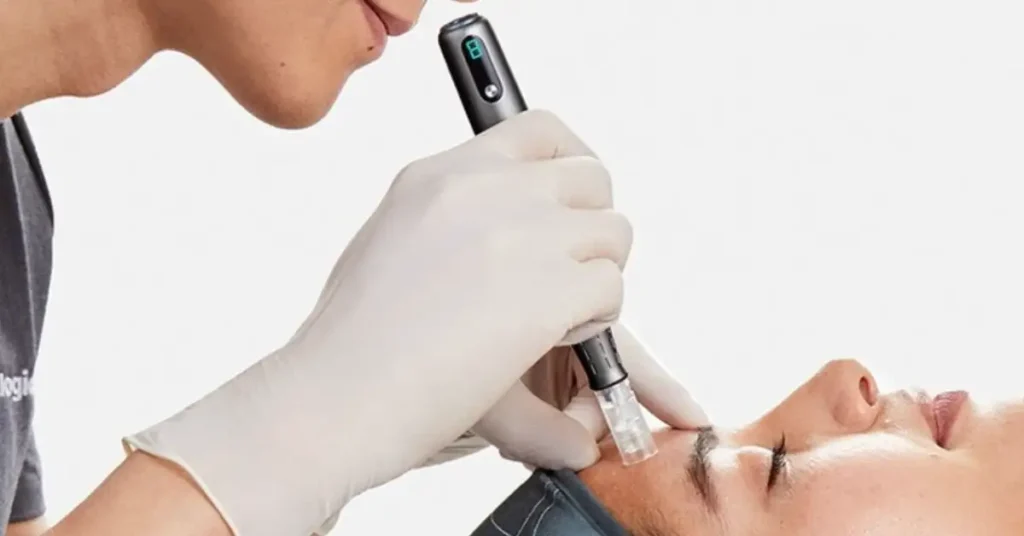
Procedure Steps
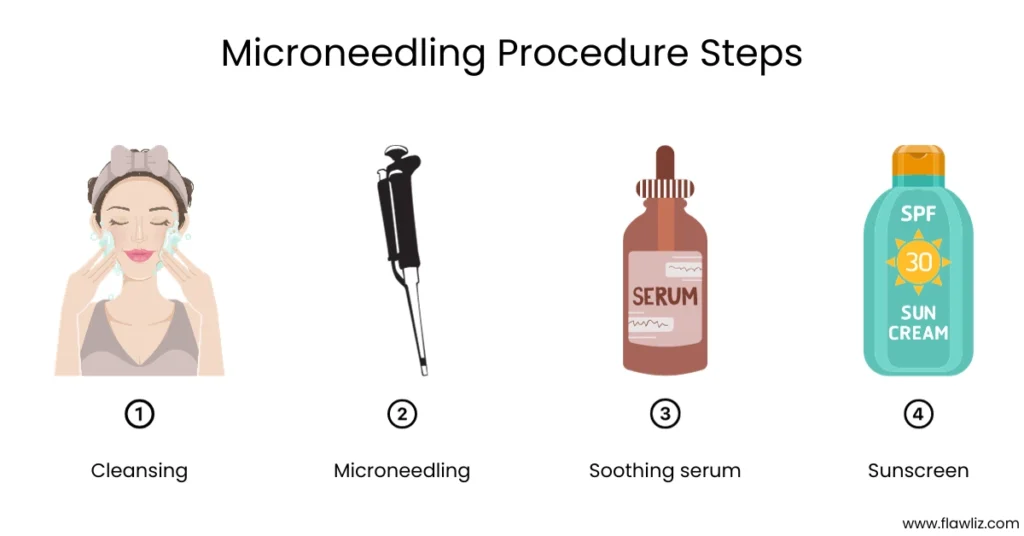
- Cleansing: My esthetician started with a gentle cleanser to remove any dirt, oil, or makeup from my skin. This step is essential for preventing infections and ensuring even penetration of the microneedles.
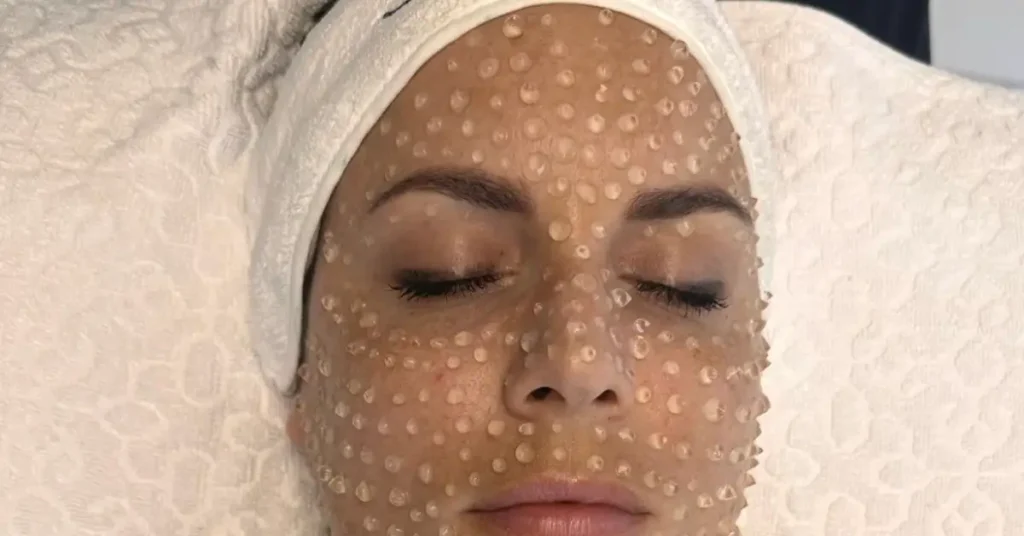
- Microneedling: A device with tiny, sterile needles was used on my skin. The device created micro-punctures, stimulating my skin’s natural healing processes and promoting collagen production.
- Soothing serum: After the microneedling step, my esthetician applied a hydrating and calming serum to help reduce redness and inflammation. This serum contained hyaluronic acid, antioxidants, and other soothing ingredients to speed up the healing process.
- Sunscreen: To protect my skin from sun damage, a broad-spectrum sunscreen with at least SPF 30 was applied as a final step. It’s crucial to keep your skin shielded from the sun after the procedure, as it becomes more sensitive and vulnerable to UV damage.
My Advice: During the week after my treatment, I made sure to follow the aftercare guidelines, such as using gentle, fragrance-free skincare products and avoiding direct sun exposure. This helped speed up my microneedling healing stages and allowed me to see the best possible results.
Microneedling Healing Stages
As someone who has gone through the microneedling process, I can attest that understanding the healing stages is crucial for the best possible outcome. In this section, we’ll discuss the three main microneedling healing stages. Just remember to be patient and gentle with your skin during the process.
Immediate Post-Procedural Stage
The first stage of the microneedling healing process begins immediately after the procedure. You might notice some redness, swelling, and pinpoint bleeding. Fear not; this is entirely normal and expected. In my experience, icing the treated area can help reduce inflammation and calm the skin. It’s also essential to keep the skin clean and prevent any infections.
Short-Term Healing Stage
Within a few days, the redness and swelling should begin to subside. At this point, my skin started to feel dry and tight, and mild peeling occurred. The short-term healing stage typically lasts around one week. It’s important to:
- Keep your skin moisturized: A hydrating serum or cream will help preserve moisture and alleviate any tightness or flakiness.
- Avoid direct sun exposure: Wear sun protection like a hat and sunscreen to shield your skin.
- Skip makeup and strenuous activities: Give your skin a break and avoid sweating, which might introduce bacteria.
Long-Term Healing Stage
During the long-term healing stage, you will gradually notice improvements in your skin’s texture and tone. Personally, my acne scars began to fade, and my skin became smoother over a couple of months. The collagen production prompted by microneedling continues for up to six months. To achieve the best results:
- Maintain a consistent skincare routine: Incorporate gentle cleansers, sunscreen, and products containing retinol or peptides to support collagen production.
- Consider additional microneedling sessions: Depending on your desired outcome, multiple sessions could be necessary.
- Stay hydrated: Drinking water and eating a balanced diet can promote healthy skin from the inside out.
Post-Procedure Care
As someone who’s experienced microneedling, I can’t stress enough how important the post-procedure care is. Today, I want to share some tips and insights on microneedling healing stages, so you can achieve the best results possible.
Skin Care
After the procedure, your skin may be red and sensitive. It’s crucial to keep it clean and hydrated. I found that using a gentle cleanser and applying a hyaluronic acid serum worked wonders for me. Hyaluronic acid is great for adding moisture to the skin and promoting the healing process.
Remember: Avoid using any harsh products or exfoliants during the first week after the treatment since your skin will be in its most sensitive stage.
Activities and Exposure
During the microneedling healing stages, it’s essential to be mindful of your activities and sun exposure. I learned the hard way that staying out of direct sunlight, wearing a wide-brimmed hat, and religiously applying a mineral-based sunscreen is essential! Sun exposure can slow down the healing process and increase the risks of hyperpigmentation.
Moreover, try to avoid strenuous activities, such as exercising or swimming, for at least 48 hours after the procedure. It may cause excessive sweating which could lead to irritation or infection. By following these guidelines, I found that my skin healed pretty well within 7 days. The results were truly worth it!
By taking the proper care of your skin and being mindful of your activities during the microneedling healing stages, you’ll be well on your way to achieving excellent results and a rejuvenated complexion. So go ahead and embrace the post-procedure care – your skin will thank you!
Potential Complications

As I’ve researched microneedling healing stages, I’ve become aware that, like any procedure, it comes with potential complications. Despite its minimally invasive nature, it’s essential to understand the possible side effects and how to manage them effectively. In the following paragraphs, I’ll go through the common side effects and provide some valuable tips on how to mitigate complications.
Side Effects
Microneedling is generally considered safe, but some side effects may occur. These may include:
- Redness and swelling
- Minor bleeding
- Bruising
- Dryness
- Infection
- Acne flare-ups
- Increased skin sensitivity
Keep in mind that these side effects are typically temporary and should subside within a few days. However, it’s always important to monitor your skin and consult a professional if these issues persist or worsen.
How to Manage Complications
If you experience side effects during your microneedling healing stages, don’t panic. I’ve compiled a list of useful tips to help alleviate and manage these complications:
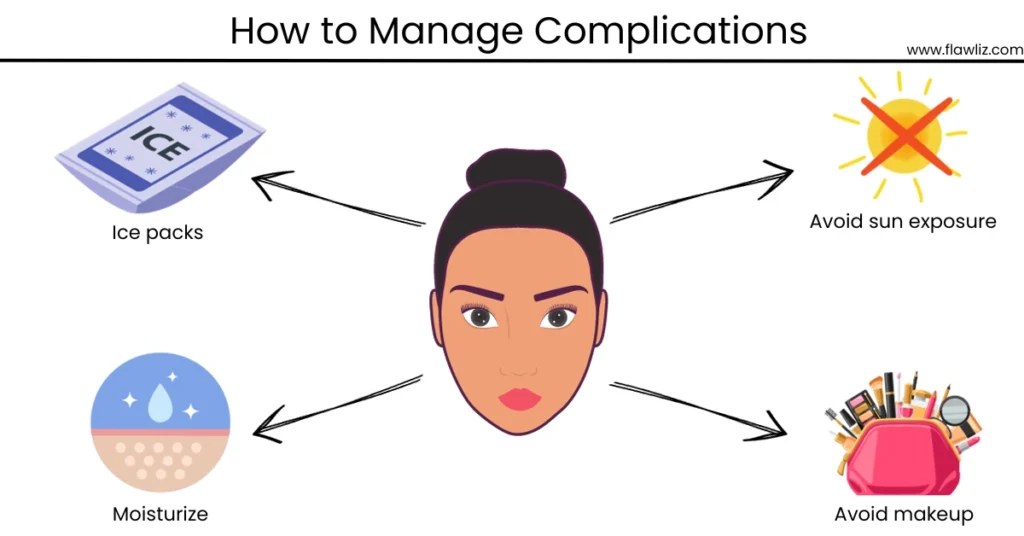
- Ice packs: Applying ice packs to the affected area can reduce swelling, redness, and discomfort.
- Moisturize: Keep your skin hydrated with a gentle, fragrance-free moisturizer to soothe dryness and flakiness.
- Avoid sun exposure: Protect your skin from harmful sun rays by wearing sunscreen and avoiding direct sunlight.
- Avoid makeup and harsh skincare products: Give your skin time to heal by avoiding makeup and other irritants.
- Follow aftercare instructions: Your skin care professional should provide aftercare instructions; it’s crucial to follow these guidelines closely.
Pro tip: Do your research and choose a reputable skincare professional to perform the microneedling procedure to minimize the risk of complications.
Remember, complications during microneedling healing stages can be minimized and managed effectively if addressed promptly and properly. Visit Healthline and PMUHub for more information about aftercare and healing stages.
Achieving Optimal Results
As someone who has personally undergone the microneedling procedure, I can attest to the incredible benefits it has brought to my skin. Let me share with you some tips to maximize the results of your microneedling healing stages while ensuring a smooth, speedy recovery.
Follow-Up Procedures
After your initial microneedling treatment, it’s crucial to follow your provider’s advice on any necessary touch-ups or follow-up sessions. I found that scheduling regular sessions every 4-6 weeks yielded the best results for my skin, as it allowed time for proper healing before the next treatment. It’s essential to give your skin time to settle and rejuvenate after each session, so be patient and trust the process.
Maintaining Skin Health
Microneedling may be a powerful tool for enhancing your skin’s appearance, but it’s not the only thing to consider. Taking care of your skin between treatments is just as important. Here are some things I recommend for maintaining optimum skin health:
- Cleanse gently: Use a mild, hydrating cleanser that won’t strip your skin of natural oils. Be extra gentle during your microneedling healing stages, as your skin may be more sensitive.
- Moisturize well: Slather on a good quality, fragrance-free moisturizer after every cleanse to lock in hydration and support the skin’s natural barrier.
- Protect: Apply a broad-spectrum SPF of at least 30 every day, rain or shine, to guard your skin against harmful UVA and UVB rays.
- Stay hydrated: Drinking sufficient water throughout the day will help maintain your skin’s elasticity and promote a natural glow.
By following these tips and actively engaging in proper skin care, my overall experience with microneedling became even more effective, allowing me to achieve outstanding results. May your journey through your microneedling healing stages be just as fruitful as mine!
Microneedling Healing Stages: Key Takeaways
As someone who has gone through the microneedling healing stages, I can’t wait to share my experience and the key takeaways with you. Microneedling is a minimally invasive skincare treatment known for its numerous benefits, such as fading acne scars, softening fine lines, and reducing hyperpigmentation. Let’s dive into the key takeaways from the microneedling healing stages.
- Day 1: The day of the treatment. You might observe redness and swelling on your skin. It’s normal since microneedling creates tiny punctures in the top layer. Your skin may feel warm and tight, similar to sunburn. Make sure to avoid direct sun exposure and apply a gentle moisturizer as part of your aftercare routine.
- Days 2 – 3: The redness begins to fade, transforming into a pinkish hue. Some minor peeling might be observed, which is a normal part of the healing process. Continue with your aftercare routine.
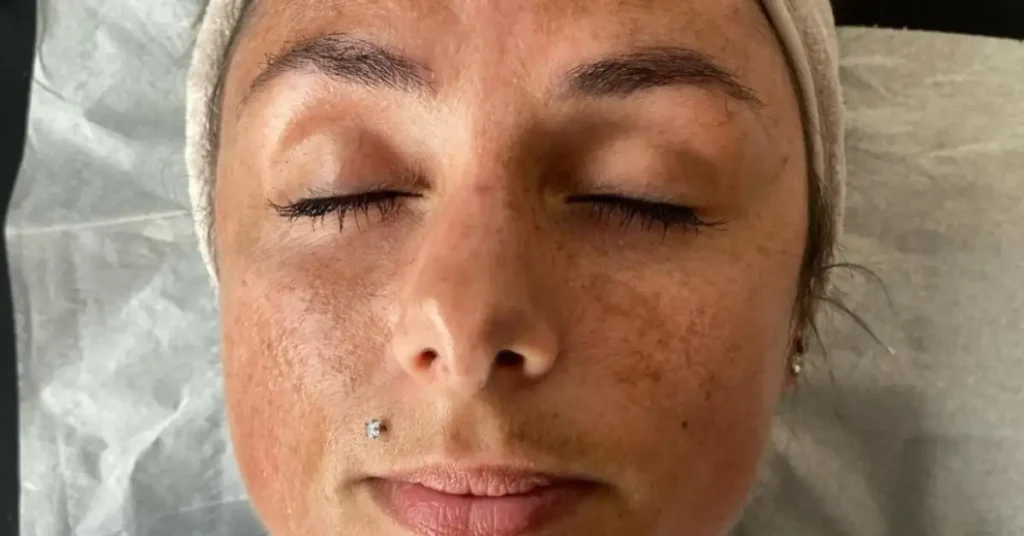
- Days 4 – 5: At this stage, the healing process noticeably speeds up. The peeling starts to subside, and your skin should return to its natural complexion. You’ll witness a noticeable improvement in the appearance of your scars and fine lines.
- Days 6 – 7: By this stage, the microneedling healing stages should be complete. The skin should be smoother, free from peeling, and visibly rejuvenated. Remember to apply sunscreen consistently and continue with a regular skincare routine to maintain the benefits.
From my personal experience, patience and consistency in aftercare are key. It’s worth noting that the microneedling healing stages can be slightly different for each individual. However, the key takeaways above should serve as a helpful guide to understanding the general healing timeline.
FAQ
How long does skin take to heal after microneedling?
After microneedling, redness and swelling usually fade within 48 hours. Complete healing may take up to two months, with visible improvement within 40-48 hours. Peeling and breakouts will also resolve over time.
What is the healing process after microneedling?
You’ll begin to notice some improvements within the first few days after microneedling as your skin’s healing processes start. However, the most significant and visible results typically take about four to six weeks to become apparent. This is the time it takes for your body to generate new, healthy collagen for smoother, rejuvenated skin.
What should skin look like after microneedling?
After microneedling, your skin may appear slightly red and feel like it has a sunburn for the first 24-48 hours. You might also notice some mild swelling and pinpoint bleeding. Over the following days, your skin can have a dry or flaky appearance as it heals.
How soon can I wash my face after microneedling?
You can usually wash your face gently with a mild cleanser about 6-8 hours after microneedling, but it’s best to follow your provider’s post-treatment instructions, as they may recommend a specific timeframe based on your skin’s condition.
What not to do after microneedling?
After microneedling, avoid sun exposure, heavy makeup, and intense physical activities for a few days. Don’t pick or scratch the treated areas, and avoid using harsh skincare products. Follow your provider’s post-treatment instructions carefully to ensure proper healing and the best results.
Can I drink coffee after microneedling?
It’s best to avoid coffee and caffeine for a day or two after microneedling, as caffeine can dehydrate the skin. Stick to hydrating, non-caffeinated beverages during the initial healing period to support your skin’s recovery.
If you liked this blog article about the topic: Microneedling Healing Stages, don’t forget to leave us a comment down below to tell us about your experience.